Why Cakes Sink: Understanding the Culprit Behind the Sunken Center
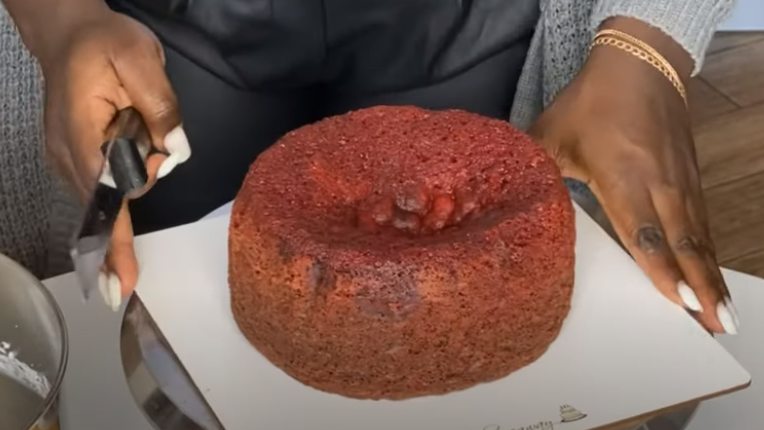
Have you ever experienced the perplexing situation where a flawlessly baked cake emerges from the oven, only to reveal an unsightly sag in its center upon slicing? Such a predicament can be exasperating, particularly when the cake was intended for a momentous occasion.
But don’t worry, for there exist numerous factors that contribute to this middle sag, and the good news is that most of them can be remedied with ease.
Understanding Cake Sagging: 9 Reasons
When it comes to the unfortunate phenomenon of cake sagging, there exists a multitude of factors that can be held responsible. Let’s delve into one of the primary culprits: the leavening agent.
1. Problems with the Leavening Agent
Leavening agents, namely baking powder and baking soda, play a crucial role in creating air bubbles that aid in the rising of the cake. However, improper usage of these agents can lead to an undesirable outcome, resulting in a sagging cake.
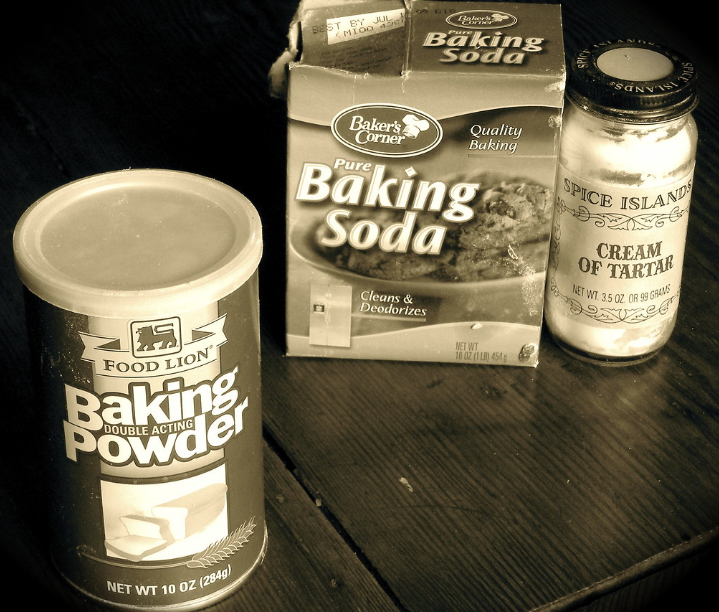
Additionally, the leavening agents themselves can sometimes introduce unwanted flavors, such as bitterness or a metallic taste, into the baked goods.
How to Solve the Problem
If you find yourself facing flat or dense baked goods with a disappointing sag in the middle, it is highly likely that the leavening agent is to blame. Here are some effective measures to rectify the situation:
- Checking the Expiration Date: Baking powder and baking soda can lose their potency over time. To ensure optimal results, it is essential to utilize fresh leavening agents that have not surpassed their expiration date;
- Using the Right Amount: The delicate balance of leavening agents is crucial for achieving the desired rise in your cake. Insufficient amounts can result in inadequate rise, while excessive quantities may lead to over-expansion and subsequent crumbling. Follow the recipe diligently to employ the appropriate amount of leavening agent;
- Checking Activation: Baking soda necessitates an acidic ingredient, such as buttermilk or vinegar, to effectively carry out its role. If your recipe lacks such an ingredient, consider adding a small amount of acid to activate the baking soda properly;
- Ensuring Freshness: Expired leavening agents can impart unpleasant aftertastes to your baked goods. To steer clear of unwanted flavors, prioritize using fresh ingredients in your baking endeavors;
- Bitter Taste Warning: It’s important to note that excessive use of baking powder or baking soda can result in a bitter taste. Exercise caution to avoid overpowering the delicate flavors of your cake.
Incorporating these measures will not only assist in preventing cake sagging but also elevate the overall taste and texture of your creations.
2. Too Hot or Too Cold Oven
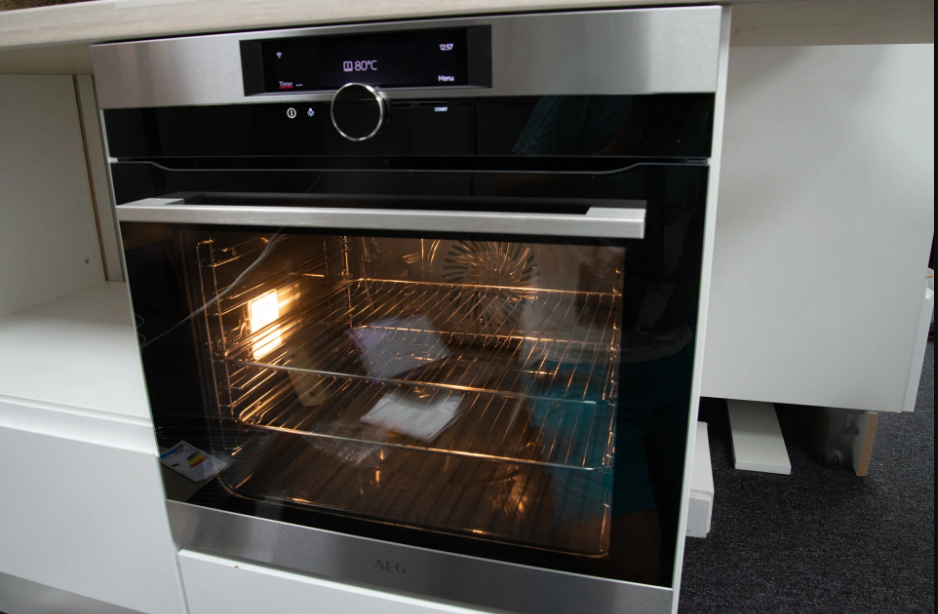
When it comes to baking a cake, the oven temperature plays a critical role. If the oven is set too low, the cake will rise slowly and unevenly, resulting in a sunken center. On the contrary, if the oven temperature is too high, the edges of the cake will set and rise rapidly, while the center remains undercooked and collapses.
How to Solve the Problem
To tackle the challenge posed by oven temperature, a few essential measures can be implemented to ensure optimal baking results:
- Preheating and Temperature Verification: Properly preheating the oven is crucial. Additionally, it is recommended to use a reliable oven thermometer to verify that the temperature is accurate and matches the desired setting;
- Calibration: Calibrating your oven with a thermometer helps to ensure its accuracy. This process involves comparing the oven’s temperature reading to the thermometer’s reading at different settings, allowing you to make necessary adjustments if discrepancies are identified;
- Vigilance and Monitoring: It is essential to closely monitor your baked goods to prevent overcooking or burning. Regularly checking on the progress and adjusting the baking time as needed will help achieve the desired results;
- Utilizing an Oven Thermometer: Using an oven thermometer during the baking process provides an additional layer of accuracy and helps maintain consistent temperature control.
Regardless of whether your oven runs too hot or cold, incorporating the practice of turning trays midway through the baking process can significantly contribute to achieving even baking. By rotating the trays, you facilitate a more uniform distribution of heat, minimizing the likelihood of uneven browning or undercooked areas.
3. Unbalanced Gluten Formation in Cake Batter
Cake batter mixing plays a crucial role in the formation of gluten, a protein that provides structure and elasticity to the cake. However, excessive gluten development can result in a dense and heavy cake with a tendency to sag in the middle. Striking the right balance in mixing is key to achieving an ideal texture.
How to Solve the Problem
To prevent overmixing and its adverse effects, consider the following tips:
- Optimal Mixing Point: Knead the cake batter until the ingredients are just combined. This ensures that the batter has reached the point of homogeneity without overworking the gluten;
- Addressing Lumps and Unevenness: If you notice lumps or unevenness in the batter, it indicates that additional mixing is required. Gently fold and mix the batter until the dry ingredients are incorporated smoothly, but exercise caution not to over-mix;
- Assessing Consistency and Smoothness: To determine if the batter has been mixed adequately, observe the consistency and smoothness. A well-mixed batter should have a uniform texture and be free from visible pockets of dry ingredients.
If, after kneading the dough, you encounter dry ingredients or unevenness, follow these steps to achieve a homogeneous mixture without overmixing:
- Gentle Folding: Carefully fold and mix the dry ingredients into the batter until they are thoroughly blended. This process helps distribute the ingredients evenly, ensuring a consistent texture;
- Avoiding Over-Mixing: Exercise caution not to overdo the mixing. Overmixing can lead to an undesirable texture and excessive gluten development, resulting in a dense and heavy cake.
By adhering to these guidelines, you can strike the right balance in mixing your cake batter, preventing excessive gluten formation and ultimately achieving a light, moist, and perfectly textured cake that doesn’t sag in the middle.
4. Over-Creaming Butter and Sugar
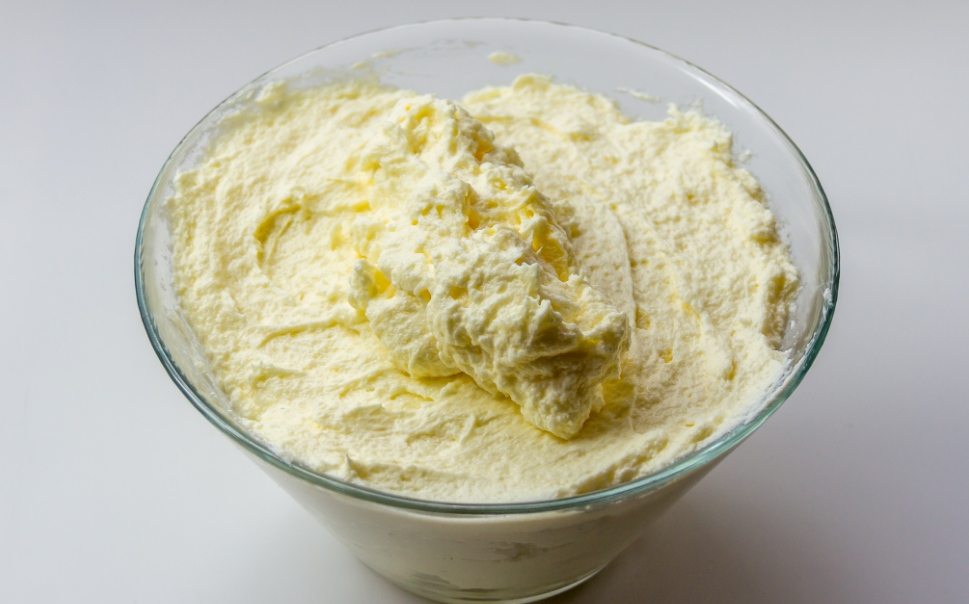
Excessive amounts of butter and sugar in a recipe can lead to an undesirable outcome: a dense, dry cake with a potentially coarse texture. One particular factor that significantly influences the final texture is over-creaming butter and sugar.
However, with careful adjustments and monitoring, it is possible to salvage the dough and achieve a satisfactory result.
How to Solve the Problem
If you find yourself facing the consequences of over-creaming, consider the following steps to rectify the situation:
- Assessing Dough Consistency: Evaluate the dough to determine if it exhibits an excessively oily texture. This could indicate an overabundance of fat resulting from over-creaming the butter and sugar;
- Cease Mixing at the Right Time: Once you realize that the butter and sugar have been adequately beaten, it is crucial to stop mixing immediately. Continuing to cream beyond this point can exacerbate the issue and negatively impact the cake’s texture;
- Compensating for Dryness: To counteract the dryness caused by over-creaming, introduce additional liquid to the batter. This extra moisture helps restore the desired consistency and prevents the cake from becoming excessively dry;
- Gradual Incorporation of Dry Ingredients: After adjusting the moisture level of the batter, gradually add the dry ingredients as specified in the recipe. Following the recommended order and incorporating the dry ingredients gradually ensures proper distribution and optimal texture.
By sticking to these tips, you can address the challenges posed by over-creaming butter and sugar, successfully mitigating the negative effects on your cake’s texture.
5. Softened Butter in Baking
Butter serves as a vital component in baked goods, contributing to their structure and texture. When properly incorporated into the dough, butter aids in creating layers and structural integrity, resulting in a flaky or tender final product. However, when butter becomes too soft, it can easily melt during the kneading process, compromising the dough’s structure and leading to a denser outcome.
How to Solve the Problem
If you find yourself confronted with overly softened butter, consider the following straightforward steps to overcome the challenge:
- Cooling the Butter: In situations where the ambient room temperature is particularly warm, the butter can quickly become excessively soft. To counteract this, place the butter in the refrigerator for approximately 15-30 minutes. This cooling period will help firm up the butter, restoring its desired consistency for incorporation into the dough;
- Utilizing Cold Water: If you require immediate usage of the butter, immerse it in a bowl of cold water for a few minutes. This method helps strengthen the butter’s structure slightly without making it overly hard. Once the butter has reached the desired level of firmness, proceed with incorporating it into the dough;
- Using an Ice Bath: Create an ice bath by filling a larger bowl with ice and placing a smaller bowl on top of it. Position the softened butter in the smaller bowl and leave it for a few minutes. The cold temperature of the ice bath aids in firming up the butter, ensuring its proper consistency for use in the dough.
If the softness of the butter continues to impact the texture of your baked goods, it may be necessary to make adjustments to the recipe. For instance, consider reducing the amount of butter slightly or adding a touch more flour to compensate for the butter’s softness.
6. Improper Rotating Cake Pans
Rotating cake pans during the baking process is a popular technique employed to achieve uniform baking and prevent uneven browning. However, executing pan rotations at the wrong time can potentially disrupt the cake’s structure and give rise to various problems.
How to Solve the Problem
If you find yourself in a situation where the cake pans have been rotated prematurely or at an inopportune stage, consider the following steps to mitigate the issue:
- Cease Further Rotations: Once you realize that the pans have been rotated incorrectly, it is essential to refrain from rotating them any further. Continuing to rotate the pans can exacerbate any existing structural problems or contribute to unevenness in the crusts;
- Minimize Interference: While the cake crusts continue to bake, minimize any unnecessary interference. Avoid frequently opening the oven door or shaking the baking trays, as such actions can have a detrimental effect on the rise and overall structure of the cakes. Allowing the cakes to bake undisturbed provides them with the best opportunity to develop their desired texture and structure.
Although encountering challenges with pan rotation can be disheartening, it presents an opportunity for growth and learning.
7. Premature Oven Door Opening
Prematurely opening the oven door before the pie has fully set can have detrimental effects. This action causes a significant drop in temperature within the oven. The influx of cold air disrupts the delicate and brittle structure of the pie, resulting in a sagging middle.
How to Solve the Problem
To rectify the issue of prematurely opening the oven door, consider the following steps:
- Assessing the Cake’s Condition: In the event that the pans were rotated at an incorrect time, carefully examine the cakes to determine their current state. Look for visible signs of sagging, falling apart, or unevenness that may have resulted from the disruption;
- Adjusting Baking Time and Temperature: Evaluate the condition of the crusts and make necessary adjustments to the baking time and temperature. This step ensures that the cakes have sufficient time to bake and set properly, compensating for any negative impacts caused by the premature door opening;
- Minimizing Further Disturbances: While the cakes continue to bake, avoid unnecessary opening of the oven door or shaking the trays. Maintaining a stable baking environment allows the cakes to rise evenly and maintain their desired structure. Consistency in baking conditions is key to achieving optimal results;
- Evaluating the Final Result: Once the crusts are fully baked, carefully evaluate the overall outcome. Although improper rotation may have had some consequences, the cakes can still be salvaged. Look for any signs of unevenness, drooping, or structural issues that may have arisen due to the premature oven door opening.
Remember, rotating the baking trays is a beneficial technique for achieving even baking. However, it’s crucial to execute the rotation at the appropriate time to avoid negatively impacting the structure and texture of the crusts.
8. Wrong Ingredient Temperature
The temperature of ingredients plays a crucial role in the texture and development of the dough. When kneading dough, using ingredients that are not at room temperature can have adverse effects. Adjusting the temperature of the dough and ensuring that the ingredients are at the appropriate temperature will facilitate the kneading process and yield improved results.
How to Solve the Problem
To address the issue of ingredients not being at room temperature, follow these steps:
- Evaluating the Dough’s Consistency: Examine the dough and assess its consistency. Cold ingredients can make the dough stiffer and more challenging to work with, while warm ingredients can result in a stickier or softer dough. Understanding the current state of the dough will guide the necessary adjustments;
- Adjusting the Dough’s Temperature: If the dough feels excessively cold and stiff, warm it slightly by placing it in a warm location or covering it with a clean kitchen towel. This gentle increase in temperature will render the dough more pliable and easier to knead.
Reheating the Ingredients: If the ingredients themselves are the main concern, they can be warmed to room temperature. Consider the following methods for common ingredients:
- Butter: Allow butter to soften by leaving it at room temperature for a while or use short bursts on low power in the microwave, frequently checking to prevent melting;
- Liquid Ingredients: If using cold milk, water, or other liquids, gently reheat them to room temperature either in the microwave or on the stove. Take care not to overheat them.
Once the ingredients have reached room temperature, incorporate them into the dough. Depending on the recipe, you may need to adjust the order in which the ingredients are added. Follow the recipe’s instructions to ensure proper integration of the ingredients.
Additionally, while kneading, closely observe the dough’s consistency. Based on its feel, additional adjustments may be required to achieve the desired texture.
Resting the dough is essential as it allows the gluten to relax and the flavors to develop. If the dough was kneaded using colder ingredients, it may require additional time to rest for proper rising. Follow the recommended rest time provided in the recipe, but be prepared to extend it if necessary, ensuring optimal results.
9. Incorrect Pan Size
Using the incorrect pan size can have significant consequences on the baking process and the final outcome of your cake. Here are two common effects of using the wrong size pan:
- Overfilling: If the pan you use is too small for the amount of batter, the cake may overfill during baking. This can result in batter overflowing from the pan, causing a messy oven and potentially an unevenly baked cake;
- Sunken Center: On the other hand, if the pan is too large for the amount of batter, the dough may spread too thin. As a result, the center of the cake can sink during baking, leading to an undesirable sunken appearance.
How to Solve the Problem
To avoid the issues associated with using the wrong size pan, consider the following steps:
- Follow Recipe Instructions: Take note of the recommended pan size specified in the recipe. Following the instructions will ensure that you choose the appropriate pan size for even baking and desired results;
- Record Correct Pan Size: It can be helpful to make a note of the correct pan size required for a particular recipe. This way, you can easily refer to it in the future and avoid using the wrong pan size again;
- Invest in Standard-Sized Pans: Having a set of standard-sized pans, such as round cake pans or square baking pans, will provide you with more flexibility when it comes to following recipes precisely. Investing in different-sized pans will enable you to match the required pan size accurately.
By selecting the right pan size, you can ensure that your cake bakes evenly and achieves the desired texture and appearance. Being mindful of pan size requirements and having the appropriate pans on hand will enhance your baking experience and yield more consistent results.
Conclusions
Maximize your chances of achieving a flawlessly risen cake by addressing potential factors and implementing necessary modifications. Ensure meticulous adherence to recipe instructions and employ correct baking methods for reliable and consistent outcomes.